Healthcare Coordinator Guide
Site-Specific Requirements
Use the Requirements link to build and publish site-specific requirements in order to provide/collect the forms your facility needs, detail instructions or provide information for next steps, or provide external website links, in addition to CPNW requirements.
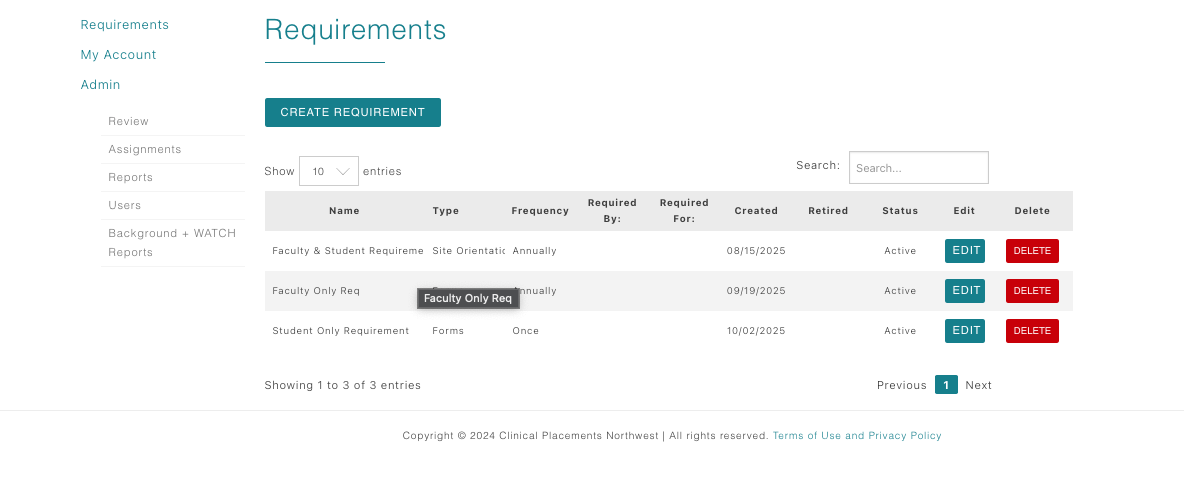
Open Requirements from the dashboard
- From the Healthcare Dashboard, click Requirements under the Admin menu.
- Review the table for existing site-specific requirements. You’ll see columns for Name, Type, Frequency, Date Created, Status, and quick Edit/Delete links.
- Click Create Requirement whenever you need to publish a new orientation note or a downloadable form for incoming cohorts.
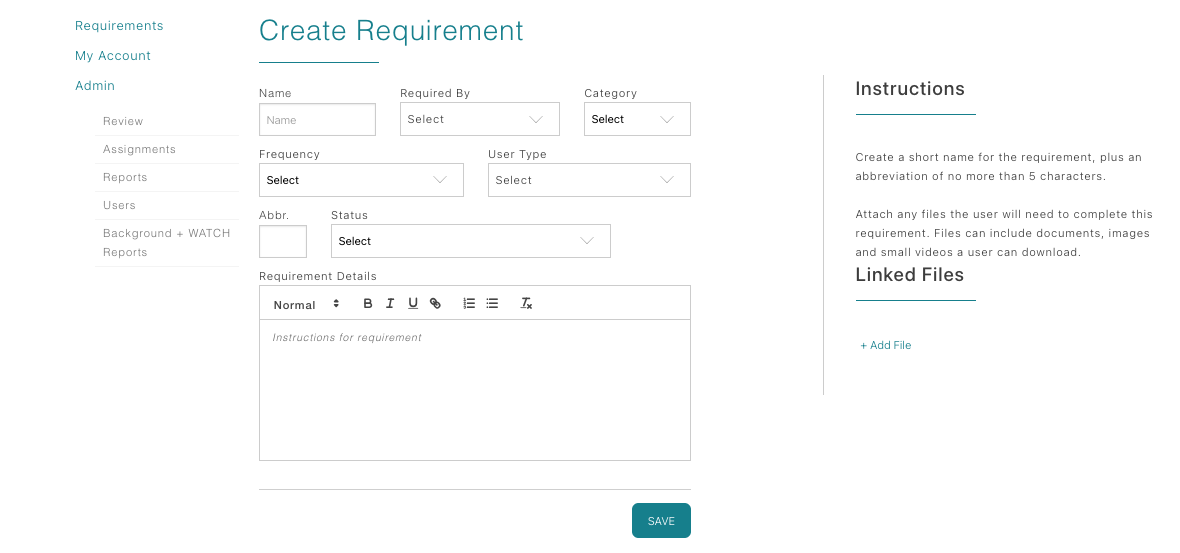
Complete the Create Requirement form
Use each field to target the right students and determine exactly how the requirement behaves.
- Name: Display title of requirement students see.
- Required By: Choose which healthcare facility you would like this requirement to be for (helpful for healthcare coordinators who cover multiple facilities).
- Category: Select Site Orientation for informational content or Forms when documentation must be uploaded.
- Frequency: Pick Once or Annually based on how often you reverify the requirement.
- Applies To: Target the discipline (e.g., pre-licensure nursing clinical, allied-health non-clinical).
- User Type: Choose whether it applies to Students, Faculty, or both.
- Abbr: Short internal abbreviation that appears in tables.
- Status: Keep Inactive while drafting; switch to Active once ready.
- Due Date: Set how many weeks (2, 4, 6, 8, 10) before placement the item is due.
- Requirement Instructions: Add detailed guidance, attach reference files, and highlight text to create hyperlinks via the toolbar’s link icon if you need to direct students to external pages.
Site Orientations include an auto-approve checkbox so the item completes once a student saves it. Forms include an allow waiver checkbox in case your facility permits coordinators to approve exceptions.
Publish and maintain your site content
- Set the Status to Active to release the requirement to programs connected to your facility; keep it Inactive while drafting.
- Update instructions any time needs change—students immediately see the new text or attachments when they revisit the requirement.
- Retire out-of-date requirements using the Delete action so coordinators know exactly which steps are current for the site.