Educational Coordinator Guide
Create an Educational Requirement
Build program-specific requirements for students or faculty—from naming and targeting the requirement to choosing the right category options.
Review existing requirements
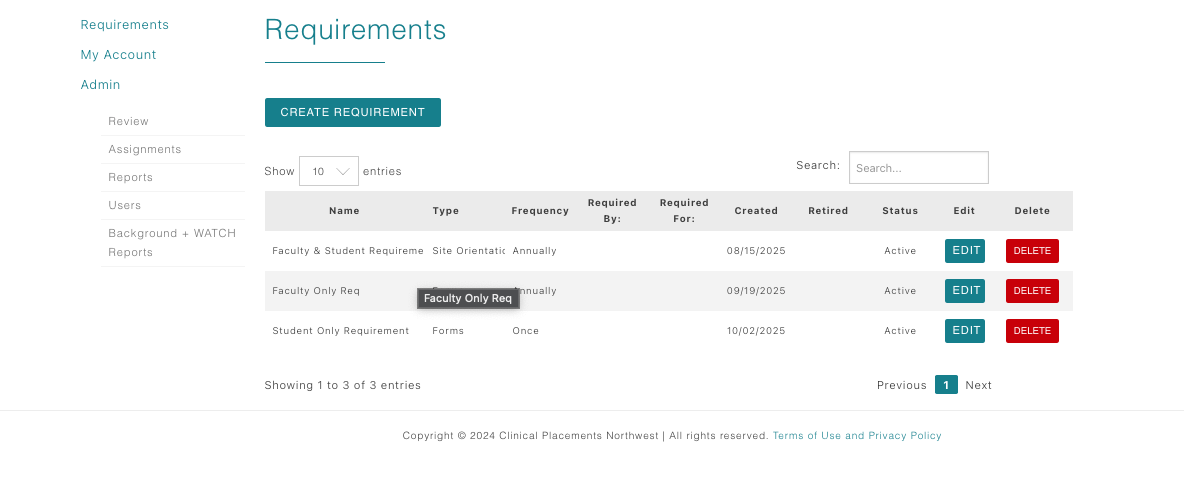
- On the Dashboard, click the Requirements link.
- The Requirements table lists each item you have already built, showing Name, Type, Frequency, Date Created, Status, and quick Edit/Delete actions.
- If you need to edit or retire an item, use the buttons in this table. Otherwise, click Create Requirement above the grid to start fresh.
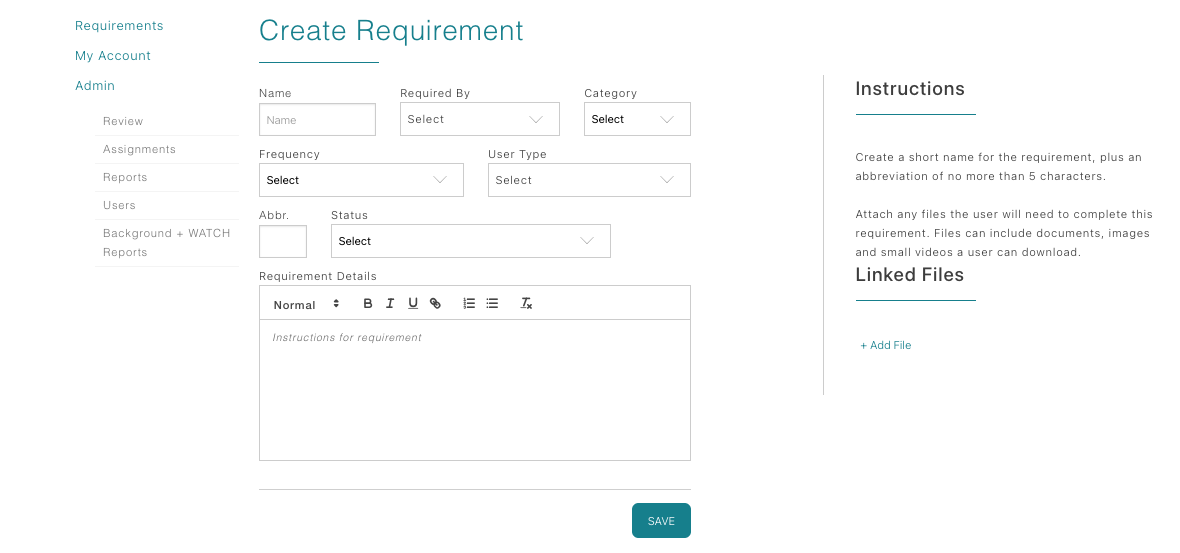
Complete the Create Requirement form
- Name: Enter the requirement title students/faculty will see.
- Required By: Select the schools/programs that must complete this requirement.
- Category: Choose the template that fits (Forms, Site Orientations, Insurance, or Licenses). Leave sub-category blank unless CPNW asks for a specific value.
- Frequency: Decide whether the requirement is due Annually or only Once.
- User Type: Target Faculty, Students, or both.
- Abbr: Provide a short code used on internal tables.
- Status: Set to Active to make it visible; leave as Inactive while drafting.
The right-hand panel lets you upload reference files students can download and includes a large text area for instructions. Spell out exactly what proof or steps you expect.
Category-specific guidance
- Site Orientations: Informational only—users cannot upload documentation. Add text or downloadable orientation packets. Enable auto-approve if you want it to complete as soon as the user clicks Save.
- Forms: Use when students must upload a document (e.g., signed PDF, driver’s license). Leave sub-category blank.
- Insurance: For facilities that demand proof of liability coverage. Choose between Insurance verified by program or Individual Insurance (user uploads policy + expiration date).
- Licenses: Ideal for faculty or graduate students with active healthcare licenses. Collect license type, issuing state, number, expiration date, and supporting files. Use + Add another license as needed.
Publish and maintain
- Upload any reference documents students need to review before submitting.
- Double-check instructions for informational requirements so students understand the purpose.
- Switch the Status to Active when you are ready for coordinators, students, or faculty to see the requirement. Inactive items remain hidden.
- Edit the requirement anytime from the main table; changes take effect immediately for everyone assigned to that program.